Why Leaves Catch the Light in Such Different Ways
Why leaves catch the light differently depends on shape, surface and position. Learn how to compare their highlights, shadows and textures outdoors.
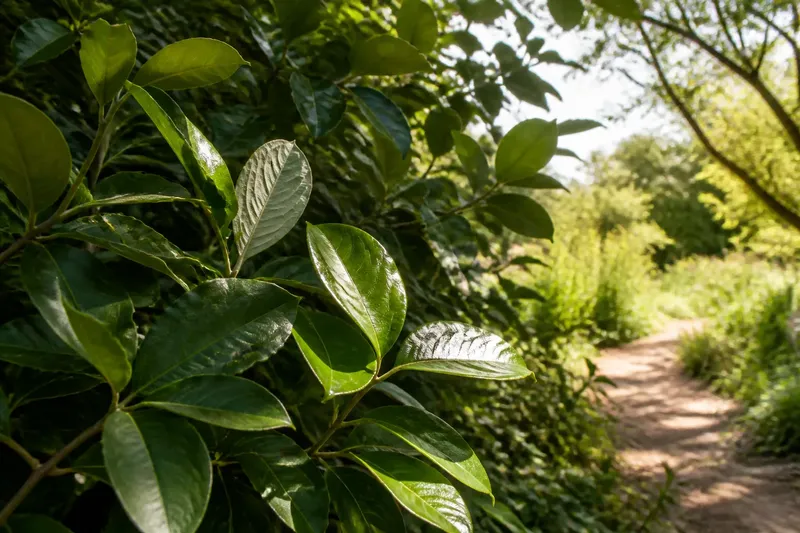
On a walk, one leaf may flash pale green as you pass, while the leaf beside it stays dark and matt. Why leaves catch the light differently often comes down to shape, surface and position—and a small change in where you stand can reveal which is at work.
These features work together rather than offering a simple code. A glossy leaf is not necessarily healthier, a pale underside is not always a sign of drought, and a curved blade has no single fixed relationship with sunlight. A closer comparison is more useful than assigning meaning to one trait.
Light meets each leaf at a different angle
Light from the sun or a bright patch of sky can reflect from a leaf, scatter across its surface or pass into its tissues. The balance shifts with the light’s direction and your viewing angle. That is why a leaf can look bright from one side and subdued from another.
A smooth, waxy-looking surface can send a sharp highlight towards you when the angle is right. The highlight may travel across the blade as a breeze turns it. Fine hairs or rough texture tend to scatter light in more directions, creating a softer, less mirror-like appearance.
Try moving your head rather than touching the plant. If the bright patch slides or vanishes, reflection is likely contributing to the effect. If the leaf remains fairly evenly lit, scattered light may be more noticeable.
Leaf shape changes the patch of light
A broad, flat blade offers a larger area that can face the light at once. A narrow or deeply divided leaf breaks that area into smaller parts, with gaps that let light through. Neither form is simply brighter: the result depends on the leaf’s direction, surrounding foliage and the position of the light.
Curves matter too. A cupped leaf may catch light on its rim while its centre remains shaded; a twisted blade can show a bright face beside a dark edge. Veins and folds create small changes in angle, so one leaf can carry several tones of green.
Compare leaves on the same plant before moving on to different species. Notice which parts face upwards, which tilt towards the path and which overlap. This keeps the comparison focused on shape and orientation rather than assuming that every colour difference comes from a different plant.
Surface details alter colour and shine
Leaves often have a thin outer layer that affects how light meets the blade. Some look smooth or slightly waxy; others appear velvety, leathery or finely textured. These impressions can help explain a difference in sheen, but thickness, moisture, age and light conditions can also change what you see.
Fine hairs may make a leaf appear silvery or softly coloured by scattering light. A pale underside can become conspicuous when a breeze turns the blade over. In other plants, the underside is simply a different shade without producing a bright flash. Treat each observation as a feature to compare, not a universal signal.
Colour is not fixed under every kind of light. A deep green leaf in shade may seem almost black beside a sunlit one, while a yellow-green blade can look more vivid against a dark background. Cloud cover, nearby walls and the colour of the ground all affect the light reaching your eyes.
Leaf arrangement changes what reaches each blade
Leaves do not sit in isolation. Their arrangement along a stem, a branch’s height and the density of nearby foliage affect which blades are exposed and which are shaded. An upper leaf may catch direct sun while a lower one receives mostly light filtered through the canopy.
Some plants hold leaves at different angles along a stem, so they do not all present the same surface to the sky. Others form overlapping layers. Look through the foliage for gaps: sunlight passing between blades may create bright flecks on leaves below, shifting as branches move.
Imagine you are comparing two leaves on a garden shrub: one at the outer edge and one tucked behind it. From the same spot, the sheltered leaf looks darker. You step around the shrub and compare them from the side; if the contrast eases, their positions were contributing, while a difference that remains may also involve their shapes or surfaces. That changing view gives you a clearer answer than the checklist alone: note whether the contrast moves with your viewpoint, stays with a particular leaf, or follows its position among neighbouring leaves.
What changes when you compare leaves?
Why does a leaf look glossy from one direction?
A smooth surface can reflect a concentrated patch of light towards your eyes at a particular angle. Shift your position slightly and watch whether the highlight moves; that points to reflection rather than a colour that stays uniform across the blade.
Why does a leaf’s underside sometimes look pale?
The underside may differ in colour or texture from the upper surface, and turning it towards the light can make the contrast more visible. A breeze, a curved blade or a low viewing angle can reveal it without implying one specific condition.
Do dark leaves always receive less light?
No. A dark appearance can result from shade, the angle of the blade, the background or the way its surface reflects light. Compare the same leaf from another position before drawing conclusions about how much light it receives.
Is a shiny leaf always waxy?
Shine can come from a smooth outer surface and the angle of reflection, but appearance alone does not identify a plant’s precise structure. Observe how the light changes without rubbing or picking the leaf.
A useful field check separates position from surface
Choose a plant beside a path or in a garden where you can look without handling it. A small notebook is enough; a phone camera can help you remember the view, though automatic exposure may alter apparent brightness. Note the plant’s position and the sky conditions so a later comparison has context.
- Check whether a highlight moves as you shift your viewpoint; if it does, record reflection as a likely influence, but if it stays fixed, compare the leaf’s shade and texture instead.
- Check the upper surface and any naturally visible underside; if their colours differ, note the contrast, but if the underside is hidden, leave it unobserved rather than turning or picking the leaf.
- Check whether the blade is flat, cupped, curved or divided; if its shape creates lit and shaded sections, record those separately, but if it is evenly oriented, look to surface and position for other clues.
- Check for visible hairs, veins, folds or a smooth-looking sheen; if one stands out, describe it without naming its cause, but if none is clear, do not infer a hidden feature.
- Check whether nearby foliage shelters the leaf; if it does, compare it with an exposed leaf on the same plant, but if both are equally exposed, focus on their angle and surface.
- Check whether cloud cover or moving branches change the appearance; if the contrast shifts with the light, note the changing conditions, but if it remains, compare the leaves’ shape and arrangement.
It is not worth trying to name every surface feature from a distance or to diagnose a plant’s condition from shine alone. A careful comparison of viewpoint, position and appearance is more useful than a quick guess.
Keep the viewing angle in your notes
When you notice why leaves catch the light differently, record not just the colour but also where you stood and whether the leaf was moving. That detail helps distinguish a momentary reflection from a muted tone shaped by shade or texture.
Next time a branch catches your eye, follow the light across several blades. Note whether the bright patch moves with you, stays on one surface or appears beneath a gap in the foliage; that simple distinction can sharpen your observation without asking any single feature to explain everything.